
Steps to Register for Classes
MyPortal Registration Guide
Do you prefer a printer-friendly guide?
Download the Quick Guide to MyPortal Registration
Updated May 23, 2025

Change Effective May 27, 2025
This page has detailed instructions for using the upgraded registration interface introduced in Winter 2023. NOTE: The old “classic” registration interface will be discontinued starting May 27, 2025.
IF YOU ARE A CURRENT STUDENT, SKIP TO Access Registration App in MyPortal on this page, as the changes start there!
If you have any questions, please reach out to our Admissions and Records Office.
Before You Start
Priority Registration
NEW STUDENTS: To register for classes in MyPortal, you must first apply for admission. Remember to declare a major (not "undecided") and select a goal of transfer, degree or certificate if you want to qualify for priority enrollment. Then come back to this page and follow the steps below to register for classes.
FORMER STUDENTS: You must reapply for admission if you missed a term, except if you skipped summer session.
| If you want to request an add code for an online class AFTER the quarter starts, you must be a continuing student or apply for admission to Foothill first. |
Access Student Registration App in MyPortal
|

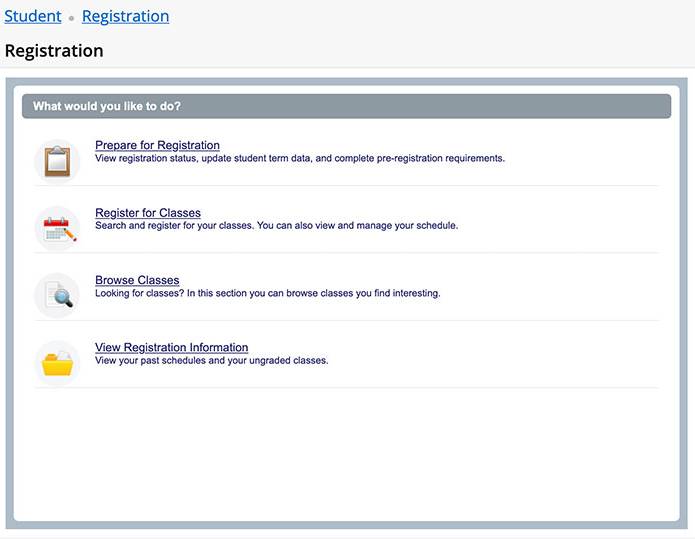
Choose What You Would Like to Do from the Registration Dashboard
Invalid Login Denied Message
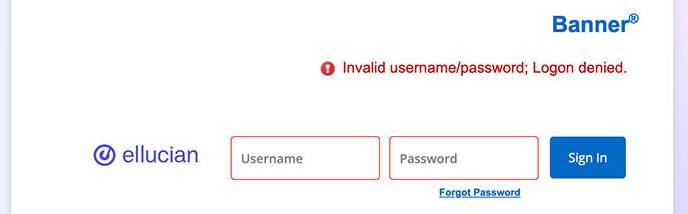
If you see a Banner Ellucian — Invalid username/password Login denied — message at any time while accessing the Dashboard or Tool Selections, this happens if your MyPortal login session has timed out.
PLEASE FOLLOW THESE STEPS TO FIX THE ISSUE
- LOG OUT of MyPortal.
- QUIT your browser session (Firefox, Chrome, or Safari).
- START a new browser session and LOG IN to MyPortal.
- If that does not work, please contact the Foothill Admissions and Records Office.
Prepare for Registration — Get Your Date to Register, Check for Holds
Of special note, get your date and time to register here for each term you are enrolled. And if you have a hold, contact the Admissions and Records Office to find out ow you can have it cleared.
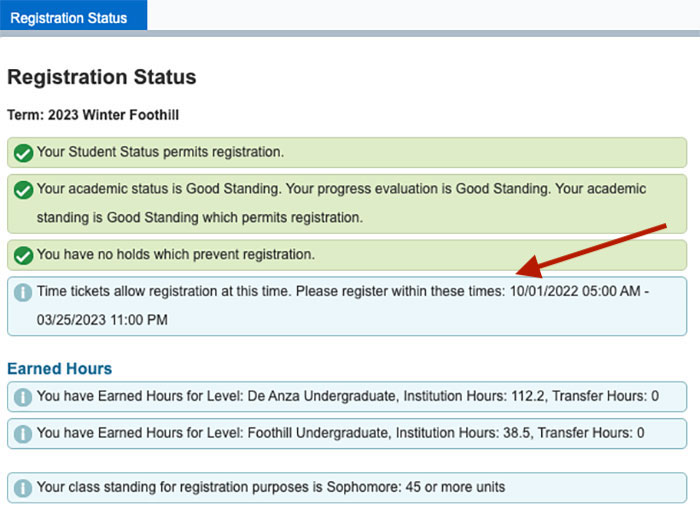 Review all information you'll find in the registration status section:
- View your registration status.
- View your academic status
- Check for holds on registration.
- Get your date to register time ticket.
- View earned hours.
- View your major.
Browse for Classes
- Search for courses in preparation for registration.
- Before registration begins, you can browse classes here to plan your schedule.
- You can also view the schedule on the Foothill website class schedule.
- As noted, when you register, it's easiest if you have a list of CRNs written down for the classes you want to take!
Register for Classes
- This is where you'll add, drop, or waitlist a class.
- When registering, you can search in this section for classes to add, OR you can most easily enter the 5-digit CRN (Course Registration Number) to add classes.
- Also view and manage your schedule.
- See Register for Classes below for specific steps.
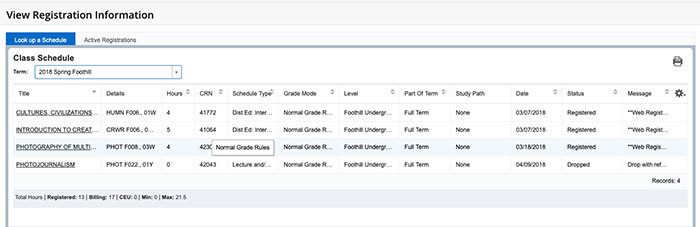
View Registration Information
- Look up to view your past schedules and ungraded classes by term
- View your active registrations for the term
Register for Classes

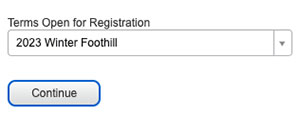
Select a Term
Select the quarter or session for which you are registering.
- From Registration Dashboard, SELECT Register for Classes
- SELECT a Term > CLICK Continue
Find Classes
To register for a class, you can Find Classes by searching for subjects, multiple at a time.
- CLICK the Find Classes tab
- Use the dropdown menu or type in one or multiple subjects.

- Scroll down and click on the Search button to see a list of classes for the subject(s) you want.
TIP: If you already know the CRN for the class you want to add, you can click on the Enter CRNs tab and add the class that way. For details, see Add Classes by CRN below.
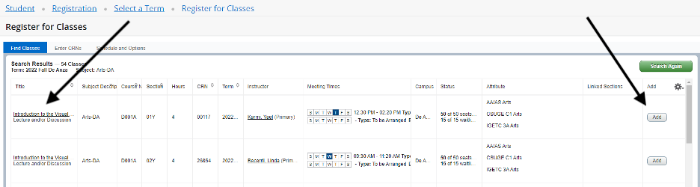
View and Add Classes
- When the list of courses appears, REVIEW each column for useful information.
- Once you decide on a class, CLICK the Add button in the right-hand column to add a class to your preliminary schedule summary. (See Complete the Registration for next steps).
TIPS for Viewing Class Information
- You can make any column wider or narrower by holding your cursor on the dividing line and moving to the right or left.
- CLICK on each course Title to view more information about the course – including required textbooks, prerequisites and other helpful details.
- HOVER over information in each column for a complete view.
- Click on the Instructor's name to see their email. (You may need their email address to request an add code if the class is full.)
- Click on the entry under Meeting Times to see the days, times and location of class meetings, as well as the starting and ending dates.
- Look in the Status column and click on the entry for each class to see details about seat availability and spaces on the waiting list.
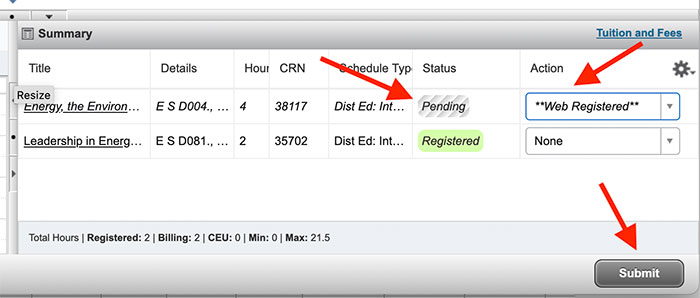
Complete the Add Registration
When you click the Add button, the class will appear as Pending in the Summary section in the bottom right area of your screen.
- Confirm the class was added to your Summary with a Pending status.
- Under Action, SELECT Web Registered and CLICK Submit button.
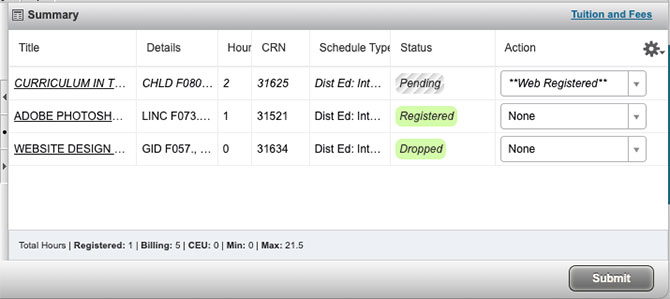
- CHECK that the class is now listed as Registered.
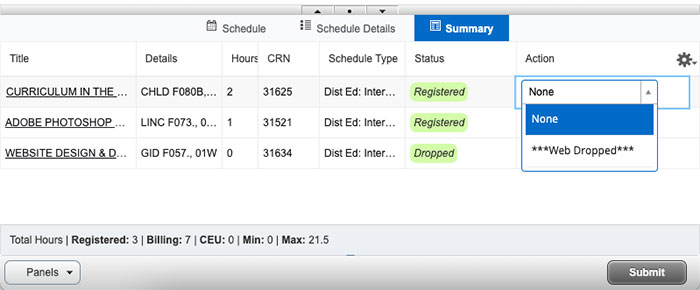 Note: If you want to withdraw from the class once you've confirmed registration, from
Action, SELECT ***Web Dropped*** and then Submit.
Note: If you want to withdraw from the class once you've confirmed registration, from
Action, SELECT ***Web Dropped*** and then Submit.
IMPORTANT
Whening adding a class, you may see an error message if you have not met a course prerequisite or if there is a registration hold on your account. Be sure to read any error message carefully and contact the Admissions and Records Office if you don't understand it.
Add Classes by CRN
You can also add classes if you already know their CRN (Course Registration Number).
TIP: You can find CRNs by using the Browse Classes feature or checking the Schedule of Classes on the Foothill website.
- Select the Enter CRNs tab.
- Type in the CRN.
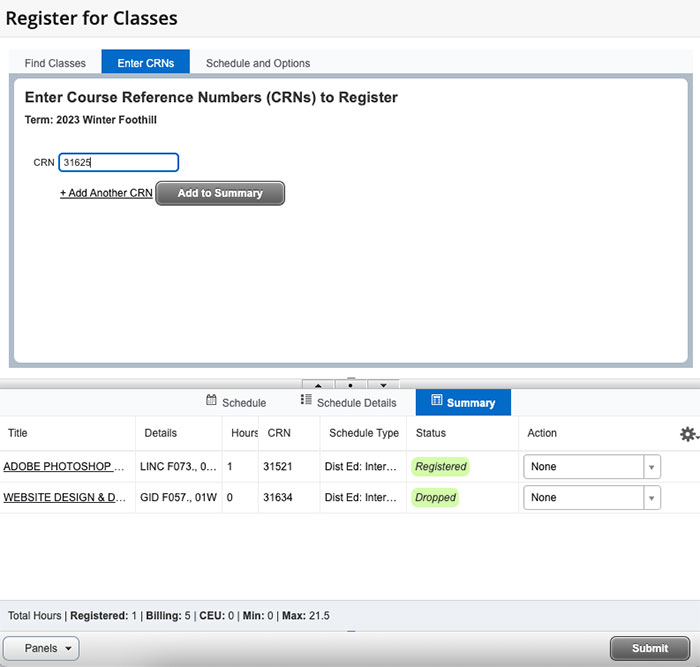
- To add multiple CRNs, click on + Add Another CRN for each additional class.
- When you have finished entering the CRNs, click Add to Summary and they will be added to your registration summary as Pending.
- Complete the same steps as above to complete registration.
Add Yourself to Waitlist
When you add a class and it is full, you can see if there is a waitlist.
- If available, SELECT Waitist from the Action Dropdown,
- CLICK the Submit button
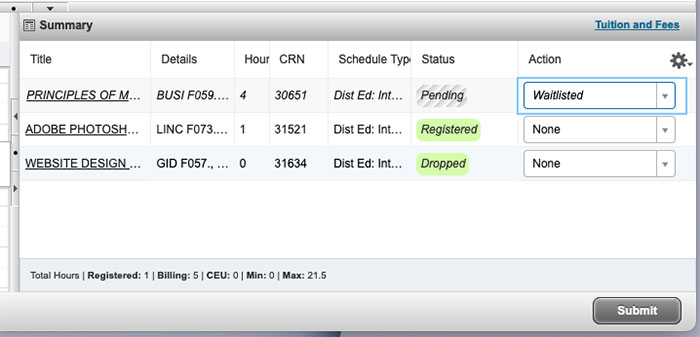
- Once you're on the waitlist, the registration system will monitor the class for openings. If a seat becomes available, the system will automatically add students in the order they are listed on the waitlist. If you are added, you will be notified by email.
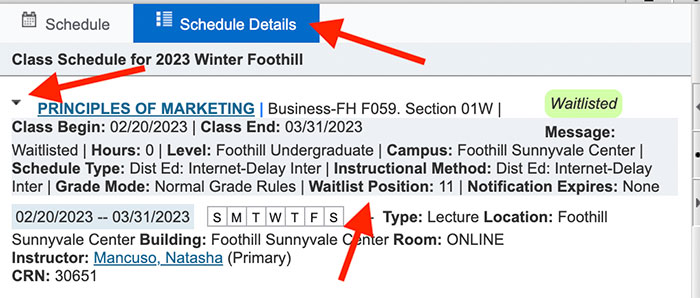
- To view your placement on the Waitlist, SELECT Schdedule Detail tab > CLICK pointer
next to Waitlisted Course Title for expanded information view > FIND Waitlist Position.
Adding a Class with an Add Code
IMPORTANT NOTE: If the ADD CODE is for a waitllisted class on YOUR SUMMARY, you will need to first drop the class (see 8. Drop/Withdraw from a Class). Then follow steps here to add the class using the ADD CODE.
Steps to Add a Class with ADD CODE Prompt
- From Registration Dashboard, CLICK Register for Classes > SELECT Term and College (Foothill)
- SELECT Enter CRNs Tab > Add the CRN for the class you want to add > CLICK Add to Summary
- If you need an ADD CODE to continue, you will see a pop up prompt. > TYPE in the Add Authorization Code > CLICK Confirm
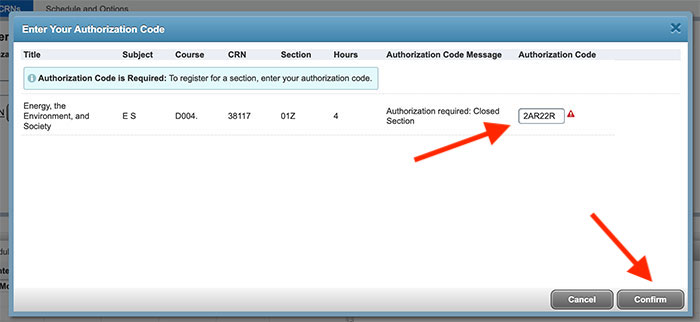
- Next VIEW your Summary > For the class, you should now see Status Pending (Make sure **Web Registered** is selected for Action) > CLICK Submit.
Drop/Withdraw from a Class
- To withdraw from a class, go to your summary of classes.
- For a registered or waitlisted class that you want to drop, SELECT the ***Web Dropped*** from the Action menu.
- CLICK Submit button.
Request Pass/No Pass
For courses that offer this option, you can choose Pass/No Pass by clicking on the Schedule and Options tab.
Before choosing the option, please review our Pass/No Pass Guidelines.
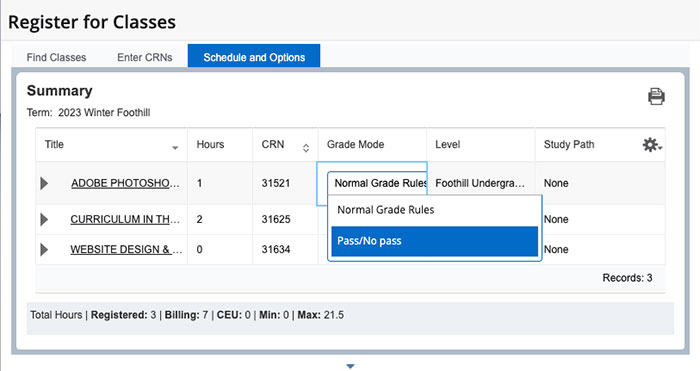
- SELECT Schedule and Options
- SELECT Grade Mode
- If Pass/No Pass is an option, make that Selection
Pay Your Fees
- CLICK on the Tuition and Fees link in your Summary box.

- VIEW your account details.
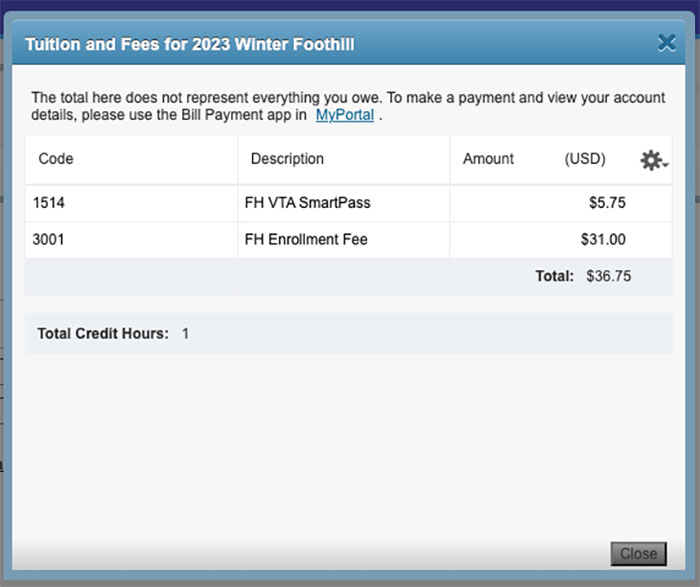
- To pay your fees, use the Bill Payment app in MyPortal.
Remember to Pay Your Fees
Learn about payment policies, including drop for nonpayment and methods of payment on the Cashier's Office website.- Need help with college costs? Visit the Financial Aid Office to learn all about grants, loans, scholarships and the Foothill College Promise — two years free tuition for
first-time, full-time students.

Need Help?
Contact Us!
Admissions and Records
650.949.7325
Student Services Building 8100, Room 8101
View In-Person & Virtual A&R Office Hours
Academic Dates & Deadlines